LedgerOptic connects to Xero so we can analyse accounting data exactly as it exists in your accounting system. By connecting directly to Xero, we ensure our analysis is based on the same journals, transactions, and trial balance figures that underpin your compliance work.
The connection is read only, transparent, and fully controlled by you.
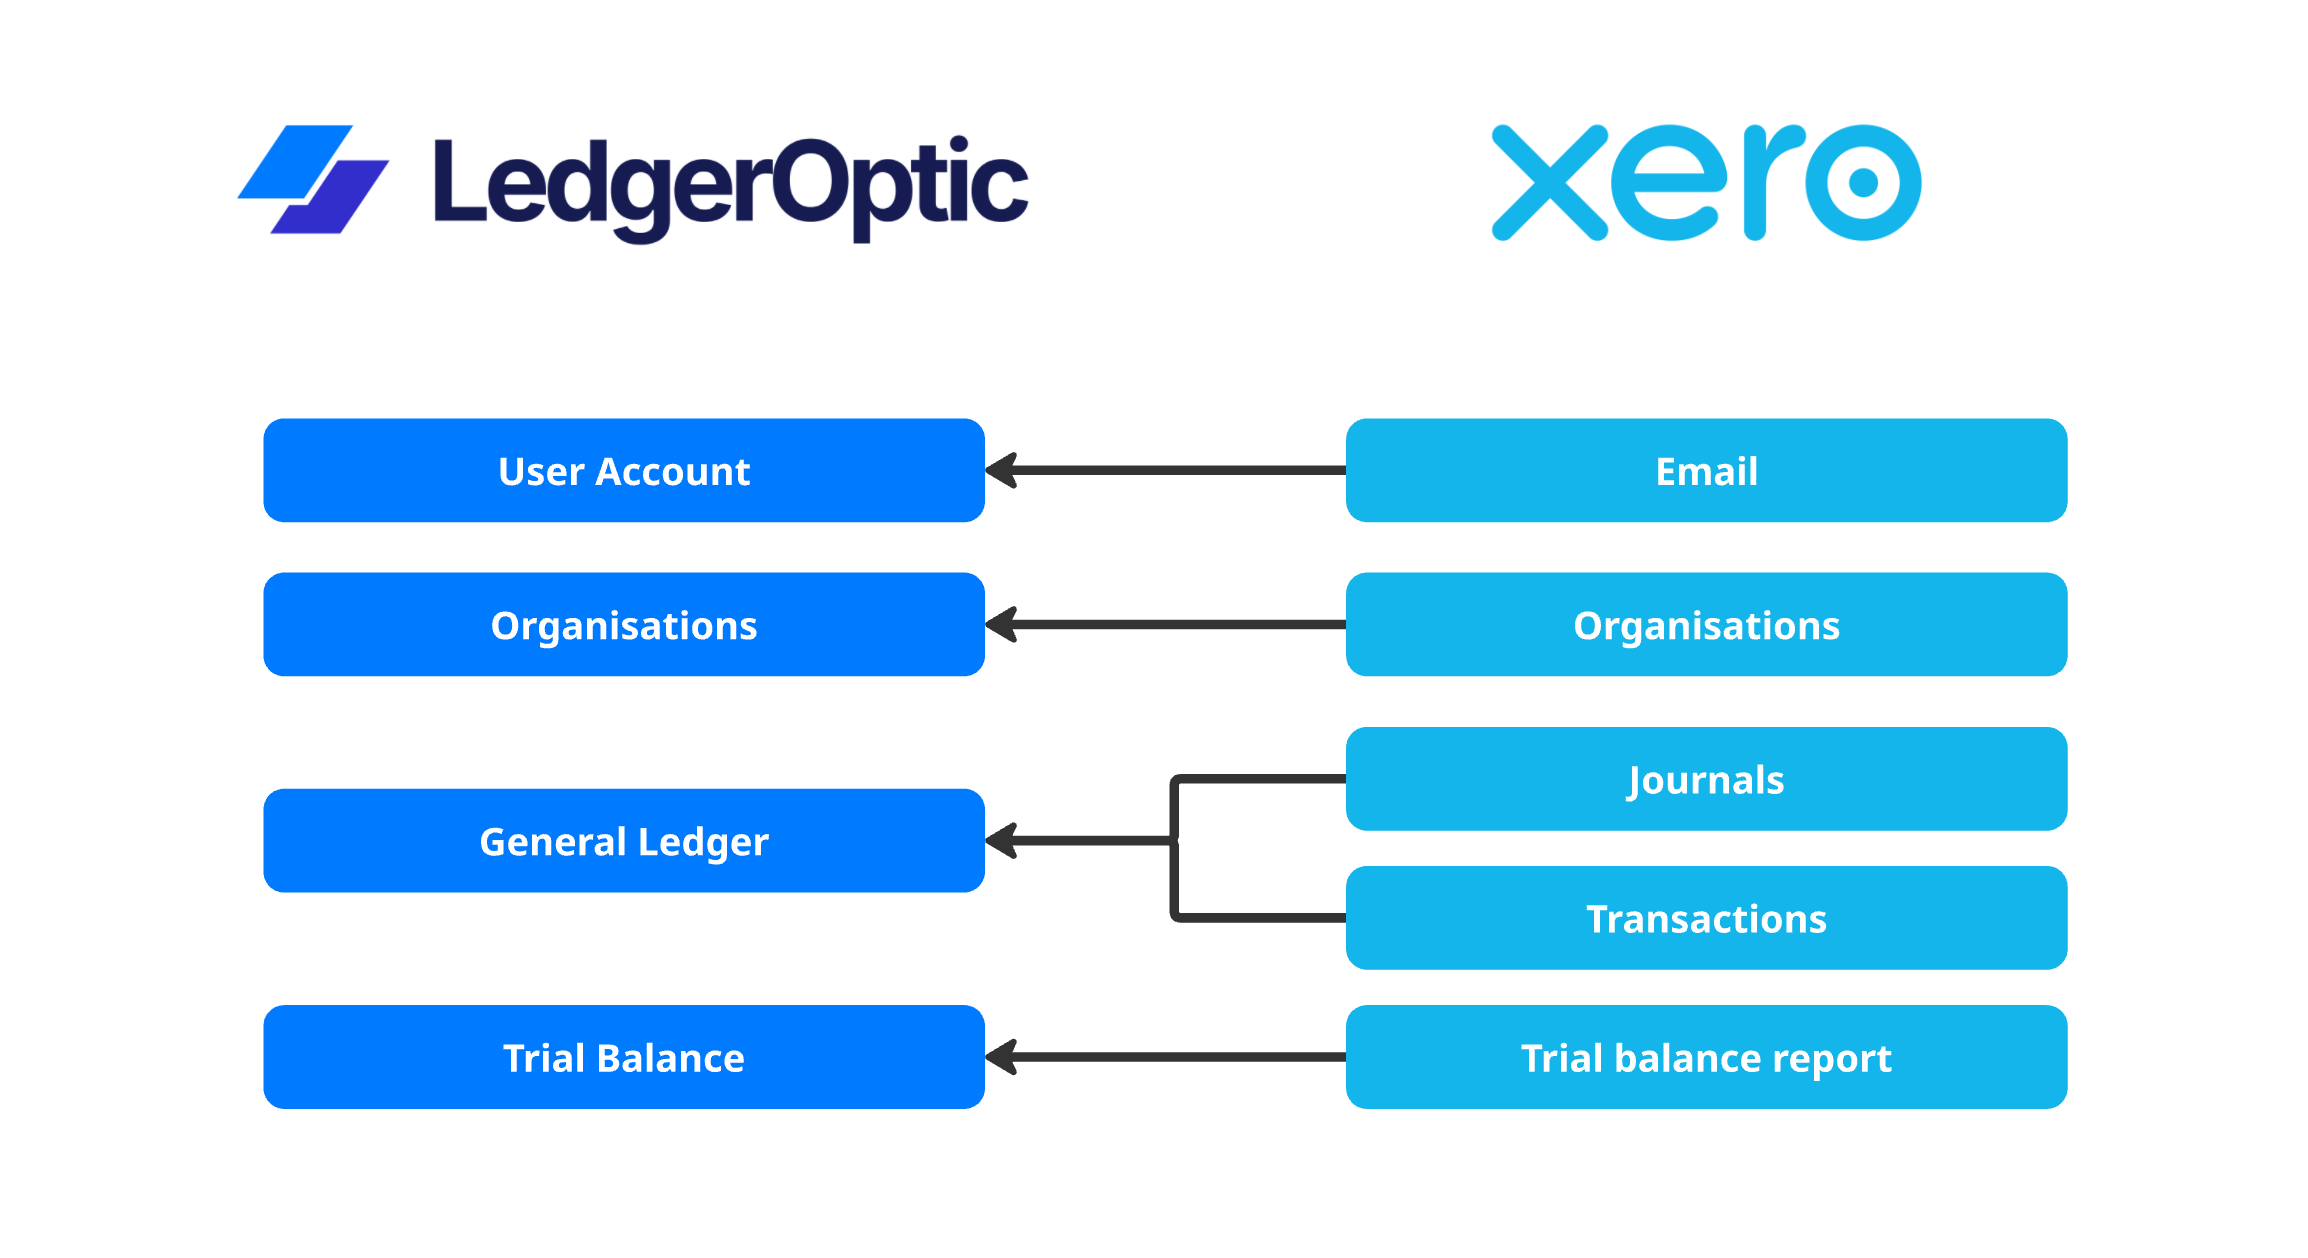
This diagram illustrates the high level flow of authentication and data access between LedgerOptic and Xero.
The connection flow
The connection process follows these steps:
- You click Connect to Xero inside LedgerOptic
- You are redirected to Xero’s secure login page
- You log in to Xero and select the organisation you want to connect
- Xero shows the permissions LedgerOptic is requesting
- You approve the connection
- Xero redirects you back to LedgerOptic with a secure authorisation token
Once completed, the organisation appears as connected in LedgerOptic and can be analysed.
What data we pull
After connection, LedgerOptic retrieves accounting data via the Xero API, including:
- User email address to support log in and account access within LedgerOptic
- Journals and transactions used to reconstruct the general ledger
- Trial balance report to obtain account balances as reported in Xero
We do not:
- Create or modify transactions
- Post journals
- Change settings inside Xero
All analysis is performed on copies of the data pulled from Xero.
How often we sync data
By default, LedgerOptic syncs data:
- When an analysis job is started
Security and data handling
Security is critical given the sensitivity of accounting data.
Key controls include:
- OAuth 2.0 with short lived access tokens
- Encrypted storage of refresh tokens
- Strict access controls at the application and database level
- Segregation of data by organisation and firm
Only authorised LedgerOptic services can access connected data, and access is logged.
LedgerOptic staff do not browse client data unless explicitly authorised for support or debugging purposes.
Revoking access
You remain in full control of access.
You can disconnect LedgerOptic at any time by:
- Navigate to Settings after clicking on your icon in the top right

- Select Xero connections in the left tab bar
- Select disconnect on your organisations:

Once revoked, LedgerOptic can no longer pull new data from Xero.
If you have questions
If you need more detail about scopes, security controls, or how data is used in specific analyses, contact us at hello@ledgeroptic.com. We are happy to walk through the integration in depth and provide supporting documentation where needed.